How to annotate a bug screenshot on Mac so your agent fixes the right thing
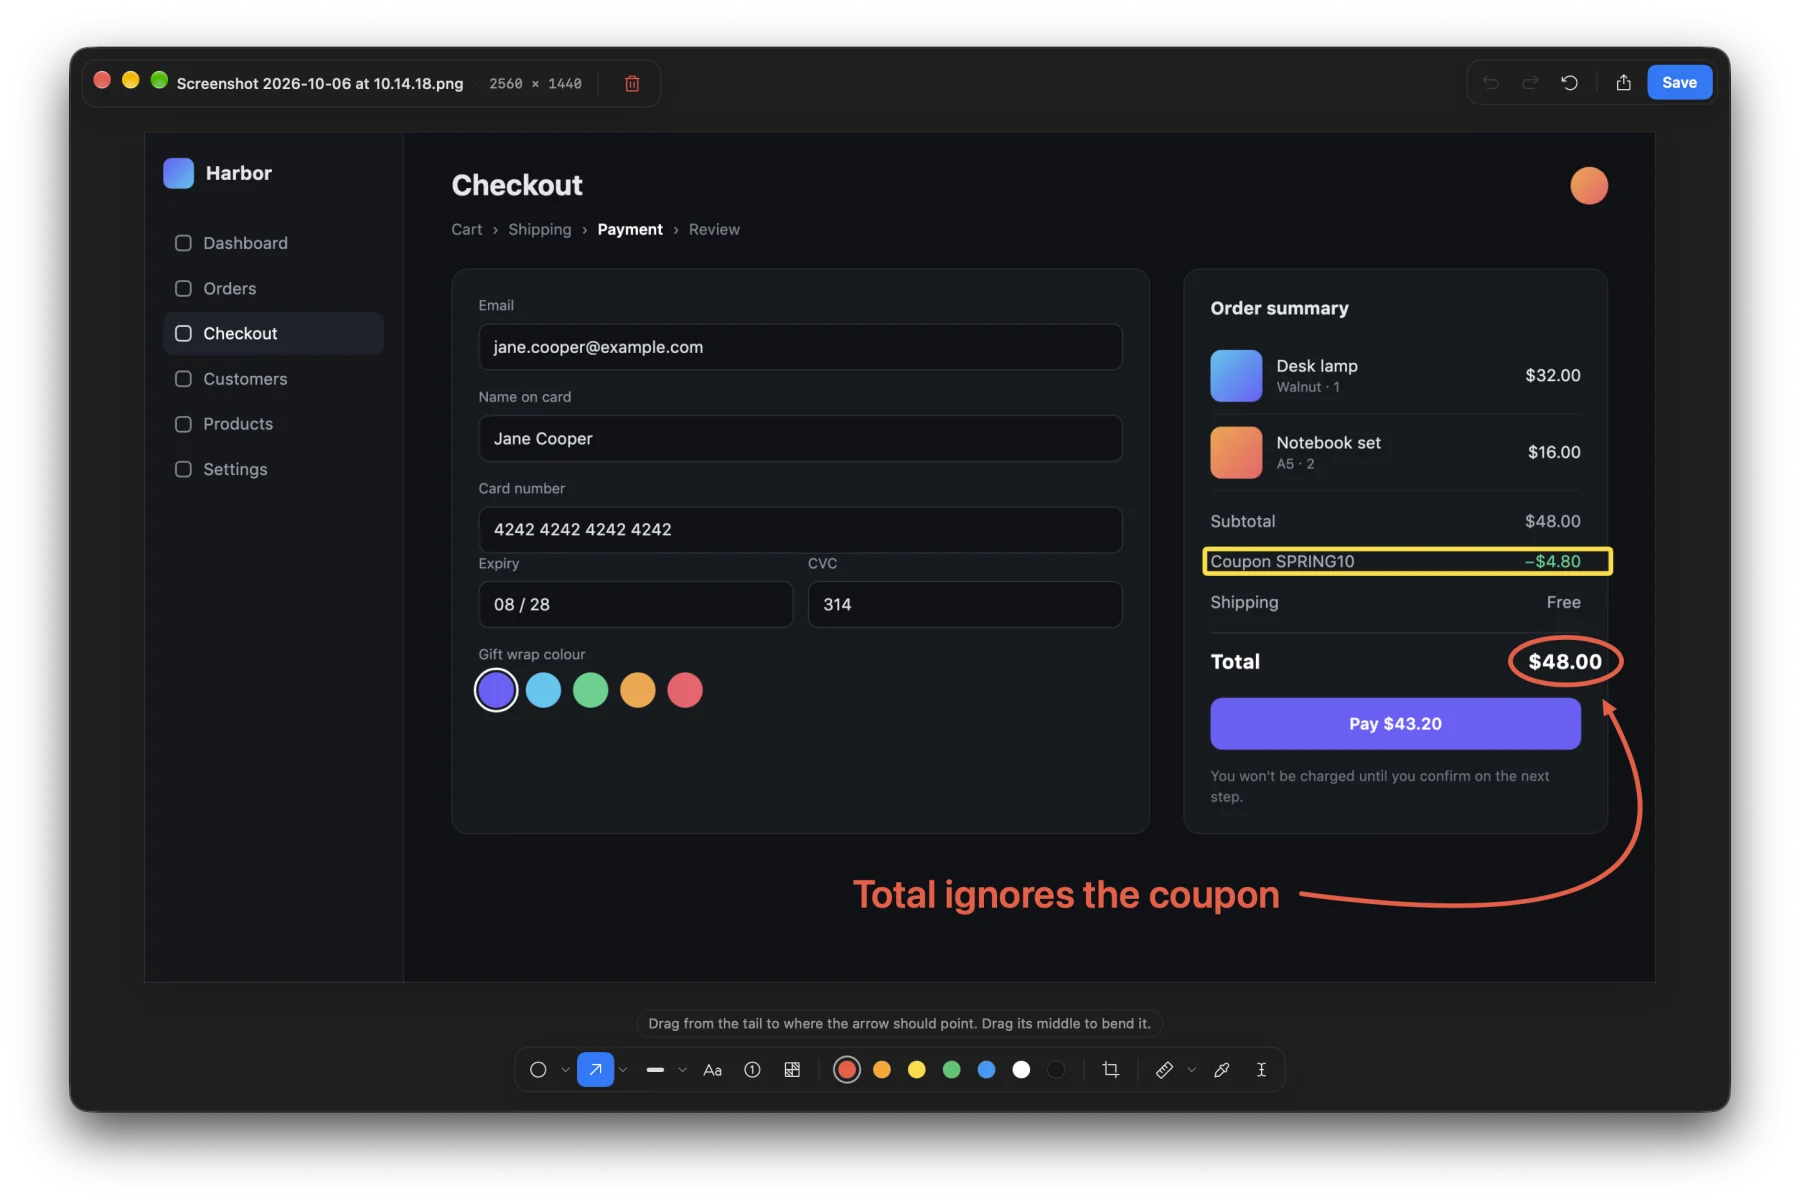
A coding agent looking at an unmarked screenshot has to guess what you mean. A checkout page has a dozen numbers on it, and "the total is wrong" could point at any of them. A box, an arrow and three words remove the guess.
The built-in way: Markup
macOS has basic annotation built in. After a screenshot, click the floating thumbnail in the corner of the screen to open it in Markup, or open the file in Preview and click the Markup button. You get shapes, arrows (the line tool with an arrowhead), text, a highlighter, and crop.
It works for an occasional screenshot. For bug reports it is slower than it needs to be: the thumbnail disappears after a few seconds, there are no numbered steps or measurements, and every edit is a few clicks deep.
What to mark, in order
1. Crop to the problem
Crop to the part of the screen that shows the bug, with enough around it to place it on the page. Less to read means less to misread, and a smaller image keeps its text sharp when the model scales it down (see How big should a screenshot be for Claude?).
2. One problem per screenshot
Three problems on one page are three screenshots. An agent works through an image with one arrow more reliably than through one with five, and you can check each fix on its own.
3. Point, then label
- An arrow at the exact element.
- A box or an ellipse when the problem is an area: a misaligned row, a cut-off label.
- Three or four words beside it: "Total ignores the coupon". The full explanation goes in your prompt.
Use one colour that stands out from the interface, such as red on a dark UI.
4. Give numbers, not adjectives
"The spacing looks off" is a guess. "The gap is 24 px and should be 16" is a fix. Measure distances and sizes on the screenshot itself:
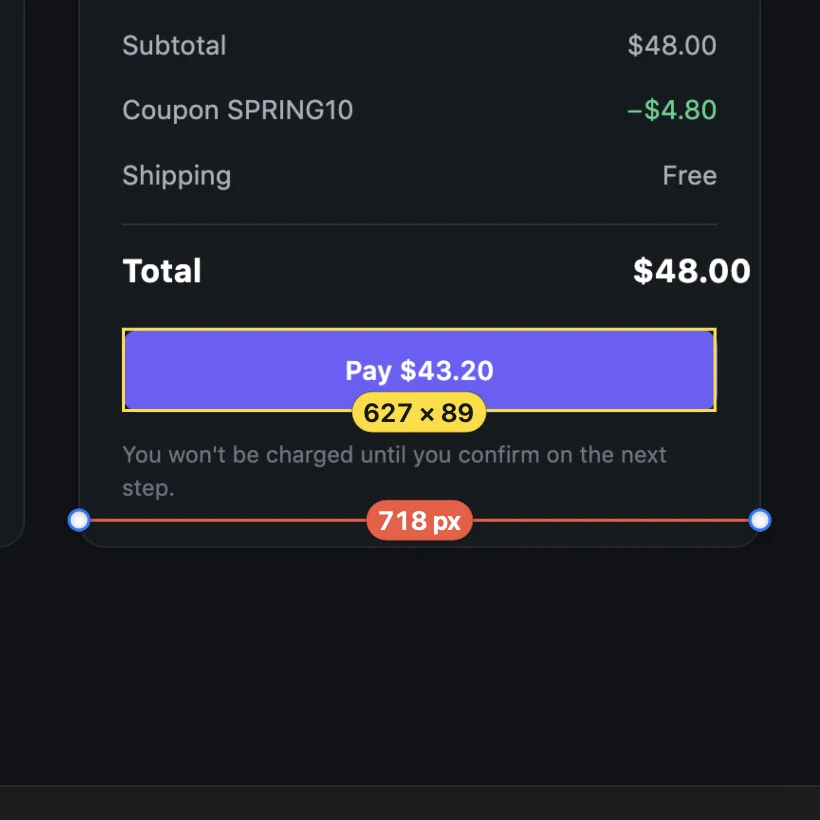
Screenshots on a Retina Mac are at twice the size the interface is laid out in, so divide by two for CSS pixels.
5. Number the steps for a flow
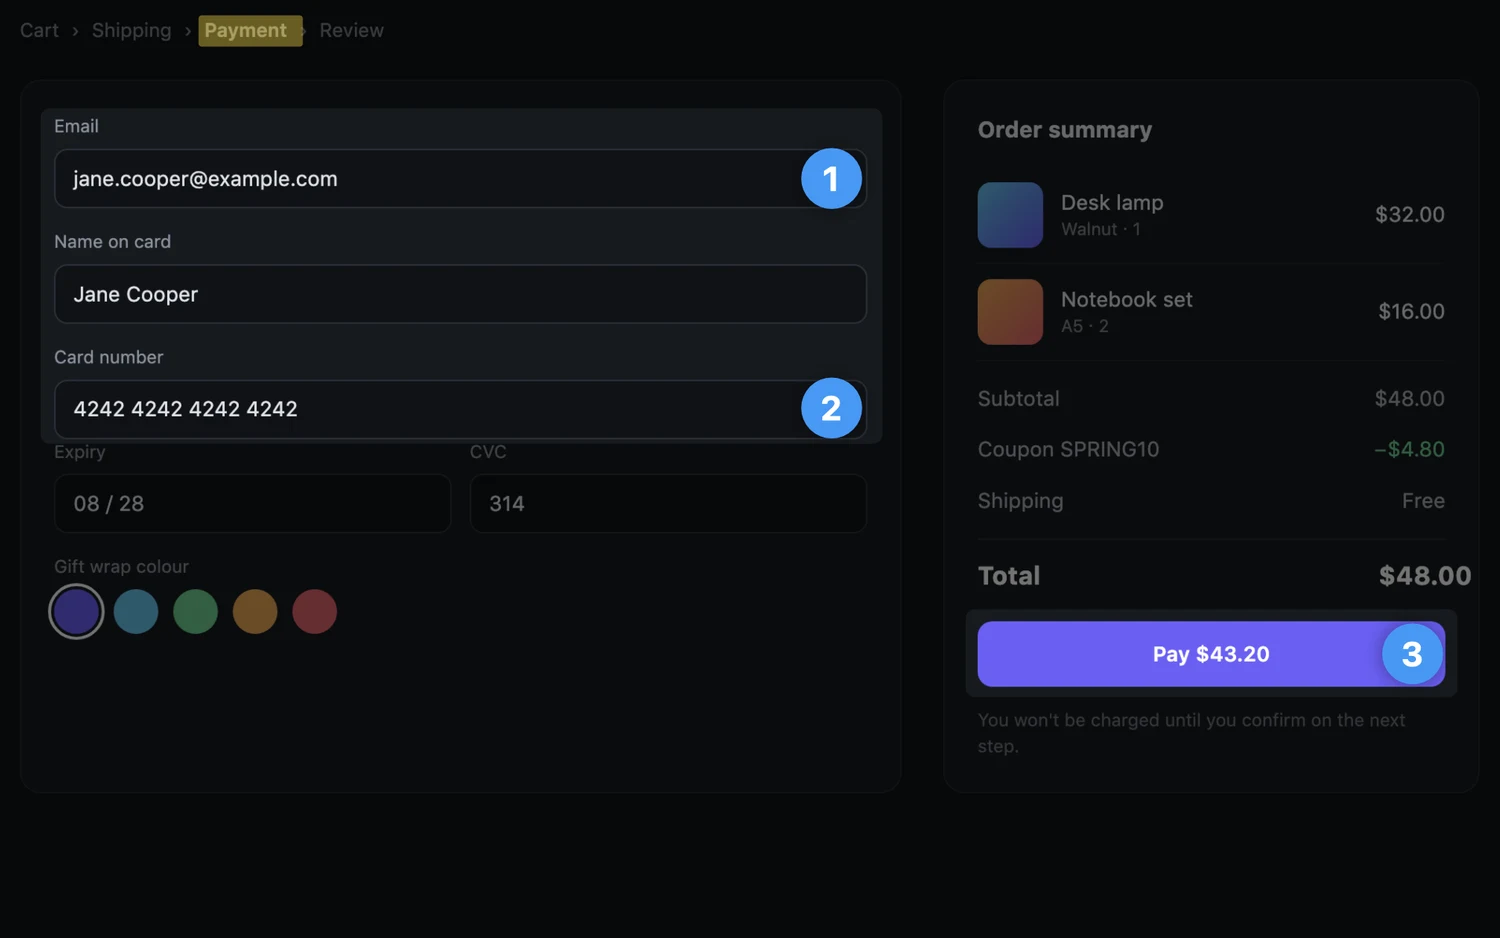
For a bug that takes several clicks to reach, number each control in order. The agent gets the path to the bug, not just where it ends.
6. Say what the image cannot
Some things are not visible: that it only happens after a coupon, or only in Safari. Put that in the prompt, or in a note saved with the screenshot.
In Bigshot's editor
Bigshot's Capture Editor is built for this. Click a capture's thumbnail in the island to open it. Every tool has a single-key shortcut:
| Key | Tool | Use it for |
|---|---|---|
| C | Crop | Cut to the problem; press Return to apply |
| A | Arrow | Point at the element; drag its middle to bend it |
| R or O | Rectangle, Circle | Box or ring an area |
| S | Spotlight | Dim everything except the part that matters |
| T | Text | A short label |
| N | Step | Numbered discs, 1, 2, 3, in click order |
| M or ⇧M | Measure | A distance or a size in pixels, copied as you finish |
| I | Colour Picker | The exact colour as HEX, RGB, HSL or OKLCH |
| B | Redact | Pixelate anything private before sharing |
Press ⌘S to save. The file now holds the annotated image; the clipboard still holds the original capture, so copy or drag the thumbnail again before you paste. The editor is free.
With a licence and a Project, you can also attach a note to the screenshot (right-click › Screenshot Context…). The note is saved in the repository's screenshot index, so the agent reads it alongside the image, even when you ask about it days later. See Let your agent find your screenshots.
Checklist
- Crop to the problem.
- One problem per screenshot.
- Arrow or box, plus three words.
- Measure instead of describing.
- Number the steps for a flow.
- Save, then send the saved version.
To hand the result to your agent, see How to paste a screenshot into Claude Code or How to give Codex a screenshot.
More from the blog
How accurate is Code Lens? Benchmarks on 20 stacks, and EmbeddingGemma 2 on a Mac
Code Lens opens the line that puts on-screen text there for 82% of lines across 20 app stacks, against 34% for grep. What EmbeddingGemma 2 adds, how fast it runs on an M1 Pro, and where it doesn't help.
How to paste a screenshot into Claude Code on a Mac
Control-V, not Command-V. The four ways to get a screenshot into Claude Code on macOS, which one to use when, and how to make the image worth reading.
Save screenshots in your repo so Claude Code and Codex can find them
Instead of pasting screenshots into every conversation, keep them in the project with an index the agent reads. How it works, what the index holds, and how to keep it out of Git.